In this blog post I'll summarize my experience with GCP MySQL Cloud SQL instances. Cloud SQL
is the managed relational database solution from Google Cloud Platform and was mentioned in
Deploy dockerized PHP Apps to production on GCP via docker compose as a POC
as the "better" way to deal with databases in a dockerized application (compared to running a
database via docker).
gcloud CLI.
Table of contents
- Setup Cloud SQL
- Create a new
mysqlinstance - Connecting to a MySQL Cloud SQL instance
- Delete a MySQL Cloud SQL instance
- Using the
gcloudCLI
Setup Cloud SQL
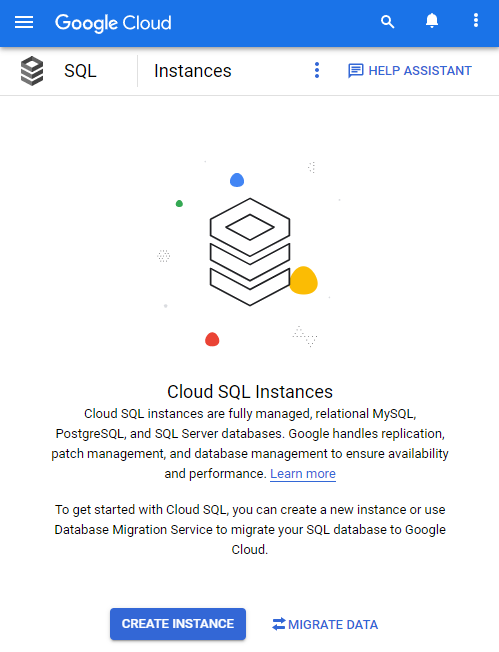
The managed solution for relational databases from GCP is called
Cloud SQL and provides multiple database technologies -
including mysql. In the Cloud Console UI it is managed
via the SQL UI that allows us to create and manage
instances.
Create a new mysql instance
To get started, we need to enable the following APIs:
Creating a new instance from the Create a MySQL instance UI is pretty straight forward and well documented in the GCP MySQL Guide: Create instances, though there are some configuration options under "Customize your instance" that I want to mention:
Machine type > Machine type: For testing purposes, I recommend choosing a "Shared core" option here (e.g. 1 vCPU, 0.614 GB) to keep the costs to a minimumConnections > Instance IP assignment: For now we'll go with a "Public IP", because setting up private connectivity requires some additional configurationData Protection > Instance deletion protection: When the optionEnable deletion protectionis enabled, the instance cannot be deleted. The option must first be disabled before this is possible (see also Delete a Cloud SQL instance).
FYI: Unfortunately, there is no "EQUIVALENT COMMAND LINE" button as it was the case when
creating the Compute Instance -
which would have come in handy for
creating the instance via gcloud cli.
Once everything is configured, click the "Create Instance" button. The actual creation can
take quite some time (I've experienced times from a couple of minutes to half an hour).
Connecting to a MySQL Cloud SQL instance
I'll explain 3 different ways of connecting to a MySQL Cloud SQL instance:
- via Cloud Shell (requires a public instance IP)
- "locally" from your laptop (requires a public instance IP)
- from a Compute Instance VM on GCP (requires a private instance IP)
Out of scope:
- using the Cloud SQL Auth proxy
As always, GCP has also an extensive documentation on the various connection methods available at GCP MySQL Guide: About connection options.
Connecting to the mysql instance with Cloud Shell via public IP
The easiest way to connect is through Cloud Shell. GCP will spin up a VM "behind the scenes" that we can control via shell session in the browser. Navigate to the management UI of the instance at
https://console.cloud.google.com/sql/instances/$instanceName/overview

# e.g. for an instance named 'mysql-1'
# https://console.cloud.google.com/sql/instances/mysql-1/overview
and click the "OPEN CLOUD SHELL" button in panel "Connect to this instance".
Please note the
Allowlisting your IP for incoming connection for 5 minutes...working.
step in the video: GCP handles all the "networking stuff" to make the connection possible for us.
Connecting to the mysql instance via public IP
Even though the instance has a public IP address (104.198.240.225 in this case, as shown in
the previous video), we can't simply connect to it via
$ mysql -u root -p12345678 -h 104.198.240.225
# ... the request will simply time out
Note: The authorized networks list is implemented on the Cloud SQL instance VM by a local firewall. Learn more about managing connections.
If we want to connect from e.g. our own computer, we need to first create a so-called "Authorized network" as described in the GCP MySQL Guide: Authorize with authorized networks.
For testing purposes I'll
retrieve my own public IP address
via wget -q -O - ifconfig.me
$ wget -q -O - ifconfig.me
213.21.32.150
and edit the mysql instance to add only this IP address as an Authorized network. The
following video shows that the connection isn't possible before I added the Authorized network
but will be afterwards.
CAUTION: Please regard this only as a proof of concept. It's not really a viable process to
retrieve your own public IP in order to allowlist it "manually". It might be "okay" though, if
you are using a VPN with a static IP. However, for the
Docker PHP tutorial we'll not use a public IP address at all, because
our mysql instance should only be available for our application VMs.
Connecting to the mysql instance via private IP
Having the MySQL Cloud SQL instance exposed via public IP is generally not advised and always carries a certain security risk. Thus, it is desirable to only allow connections via private IP. Be aware that this has some caveats, though (see section Caveats for using a private IP only).
In order to connect to the MySQL Cloud SQL instance via private IP (i.e. from a Compute Instance VM), we must first understand how the network configuration of the "managed" products of GCP is set up. This is explained in detail in the GCP MySQL Guide: Learn about using private IP. In short:
- we use a private network that allows all of our VMs to communicate
- such a network is called VPC (virtual private cloud)
- since "we" (as a user of GCP) create and manage our application VMs ourselves, the VMs live "directly" in this network
- the managed services like Cloud SQL are "doing their own thing", i.e. GCP takes care of all the networking stuff but keeps it isolated from "our" network
- in consequence, our VMs cannot talk to a MySQL Cloud SQL instance, because it lives on a different network
- fortunately, there is a technique called VPC peering that can connect different VPCs and thus enable communication
- to make this work, we need to "reserve" a range of IPs in "our" VPC and make it available to Cloud SQL by peering with the Google Cloud Platform Service Producer
See also the Example in the MySQL Guide: Learn about using private IP

Concrete steps to connect via private IP
In short:
- enable the Service Networking API
- navigate to the "default" network UI
- open tab "PRIVATE SERVICE CONNECTION" and sub tab "ALLOCATED IP RANGES FOR SERVICES" and click
the button
"ALLOCATE IP RANGE"- give it a name, e.g. "google-internal-services"
- and select option "Automatic" with a prefix length of 16 (this determines the number of possible Cloud SQL instances, see also the docs on Allocated range size)
- open tab "PRIVATE SERVICE CONNECTION" and sub tab "PRIVATE CONNECTIONS TO SERVICES" and click
the button
"CREATE CONNECTION"- choose "Google Cloud Platform" in the "Connected service producer" drop down field and select the "google-internal-services" range that we just created for the "Assigned allocation" drop down field
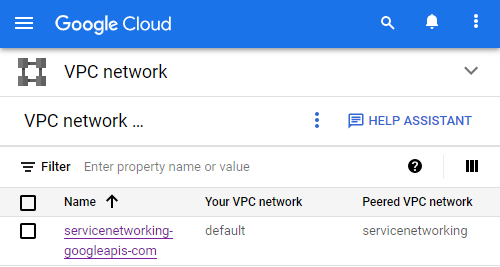
- once the "peering" is done, you can also observe a corresponding entry in the
VPC network peering UI
- create a new MySQL Cloud SQL instance
(or modify an existing one)
- under
Connections > Instance IP assignmentunselect "Public IP" and select "Private IP" select the network "default" - Note: The instance is being shutdown and restarted, i.e. this operation will lead to a service disruption and can take up to several minutes
- under
- once the update is done, navigate to the MySQL Cloud SQL UI of the instance and find the private IP in panel "Private IP address"
To test the connectivity from a VM, perform the following steps:
- create a Compute Instance VM in the "default" network
- log into the VM via the UI
-
sudo apt-get install default-mysql-client -y connect to the MySQL Cloud SQL instance via
mysql -h $privateIp -u root -pwhere
$privateIpis the private IP of themysqlinstance
See also the GCP MySQL docs:
Caveats for using a private IP only
- we need to provide some additional networking configuration (explained above)
it's no longer possible to connect via Cloud Shell:
Cloud Shell doesn't currently support connecting to a Cloud SQL instance that has only a private IP address.
once a private IP is assigned, it cannot be un-assigned:
After you configure an instance to use private IP, you cannot disable private IP connectivity for that instance.
If you choose to let Cloud SQL allocate your private IP for an instance, the addresses for all instances you later configure in that VPC network are automatically allocated in the same IP address range.
- we can no longer connect from "our" computer, because it doesn't live in the same private network. This can be problematic if you are used to using UI tools like MySQL Workbench to manage your database - please check out the following articles if this is relevant for you:
But tbh, I would probably rather
create an SSH tunnel with the gcloud cli
on a small Compute Instance VM via
gcloud compute ssh $computeInstanceName --zone=$computeInstanceZone -- -N -L 3306:$mysqlInstanceIp:3306
Delete a MySQL Cloud SQL instance
Once again, GCP is doing a great job documenting the process to delete a MySQL Cloud SQL instance in the GCP MySQL Guide: Delete instances.
Please give it a read as there is at least once thing that I found quite un-intuitive: Even
after deleting an instance, the name of the deleted instance is "blocked" for a week. In my case,
this created some problems, because I was making assumptions about the name in other
parts of my code (e.g. I was expecting that the name of the instance is always mysql), but
when playing around with Cloud SQL I learned too late, that I couldn't re-use the name after
deleting the instance for testing purposes.
> Cloud SQL allows the re-use of an instance name immediately after the instance is deleted.
Source: GCP Release Notes from 2022-09-21
Note: If "Deletion protection" is enabled, it needs to be disabled first - which is usually quite a fast operation.
See the following video for a visual representation of the process (please ignore the "blocked" instance name issue at the end):
Using the gcloud CLI
Even though I like using the UI to "explore and understand" how things are working, the goal is
always a more "unattended" approach, e.g. via the
gcloud cli.
Since I'm gonna use a MySQL Cloud SQL instance as replacement for a mysql docker container for
the next part of the Docker PHP tutorial, I'll focus on creating an
instance with a private IP address only, update the root password and set up a default database.
The following commands assume that you have created a master service account with owner
permissions and activated it for glcoud with a default project. See also
Preconditions: Project and Owner service account
Activate the service account
project_id=pl-dofroscra-p
gcloud auth activate-service-account --key-file=./gcp-master-service-account-key.json --project=${project_id}
Enable the necessary APIs
gcloud services enable \
  compute.googleapis.com \
  sqladmin.googleapis.com \
  cloudresourcemanager.googleapis.com \
  servicenetworking.googleapis.com
cloudresourcemanager.googleapis.com is necessary to create the IP range allocation in the
next step.
Create an IP range allocation
private_ip_range_name="internal-gcp-services"
network="default"
ip_range_network_address="10.111.0.0"

gcloud compute addresses create "${private_ip_range_name}" \
  --global \
  --purpose=VPC_PEERING \
  --prefix-length=16 \
  --addresses="${ip_range_network_address}" \
  --description="Peering range for GCP Services" \
  --network="${network}"
The --addresses flag can be used to define the network address of the defined range. If it is
not given, GCP will choose a random one.
Create the VPC peering with servicenetworking.googleapis.com
private_ip_range_name="internal-gcp-services"
network="default"

gcloud services vpc-peerings connect \
  --service=servicenetworking.googleapis.com \
  --ranges="${private_ip_range_name}" \
  --network="${network}"
Create the mysql instance
gcloud beta sql instances createreference- GCP MySQL Guide: Create instances
- GCP MySQL Guide: Configure an instance to use private IP
Caution: The --allocated-ip-range-name option is currently (2023-04-13) only available in
the beta tools of the gcloud cli.
You might need to install them first via
gcloud components install beta.
mysql_instance_name="mysql"
version="MYSQL_8_0" # see https://cloud.google.com/sdk/gcloud/reference/sql/instances/create#--database-version
cpus="1"
memory="3840MB"
region="us-central1"
private_ip_range_name="internal-gcp-services"
network="default"

gcloud beta sql instances create "${mysql_instance_name}" \
  --database-version="${version}" \
  --cpu="${cpus}" \
  --memory="${memory}" \
  --region="${region}" \
  --network="${network}" \
  --no-assign-ip \
  --allocated-ip-range-name="${private_ip_range_name}"
The --no-assign-ip flag is responsible for not assigning a public IP.
Set the root password
gcloud sql users set-passwordreference- GCP MySQL Guide: Manage users with built-in authentication: Change a user password
mysql_instance_name="mysql"
root_password=12345678

gcloud sql users set-password root \
  --host=% \
  --instance "${mysql_instance_name}" \
  --password "${root_password}"
Using --host=% will allow access from any remote host, see
docu for the --host parameter
Cloud SQL user's host name expressed as a specific IP address or address range. % denotes an unrestricted host name. Applicable flag for MySQL instances; ignored for all other engines.
FYI: Instead of "root", we could also use a different username like "application_user" and MySQL would create that user automatically with the given password (without any privileges).
Create a default database
gcloud sql databases createreference- GCP MySQL Guide: Create and manage databases: Create a database on the Cloud SQL instance
mysql_instance_name="mysql"
default_database="application_db"

gcloud sql databases create "${default_database}" \
  --instance="${mysql_instance_name}" \
  --charset=utf8mb4 \
  --collation=utf8mb4_unicode_ci
Wrapping up
Congratulations, you made it! If some things are not completely clear by now, don't hesitate to
leave a comment. You are now able to manage MySQL databases on GCP via the UI as well as via the
gcloud cli.
Wanna stay in touch?
Since you ended up on this blog, chances are pretty high that you're into Software Development (probably PHP, Laravel, Docker or Google Big Query) and I'm a big fan of feedback and networking.
So - if you'd like to stay in touch, feel free to shoot me an email with a couple of words about yourself and/or connect with me on LinkedIn or Twitter or simply subscribe to my RSS feed or go the crazy route and subscribe via mail and don't forget to leave a comment :)
Subscribe to posts via mail