In this tutorial I'll show my typical procedure when setting up a new development environment on a fresh Windows 10 laptop. It's not like I do this every day (as 'typical' might suggest) but when I started my current job, I had to do it several times for me (switched my laptop) as well as for some of my co-workers. I'm going to cover this step-by-step and will include (hopefully) all necessary information for you to get this setup running as well.
This is the first part of a three-part tutorial, focusing on the development on Windows. In the second part I will explain how to make the shift to using a virtual machine and in the third we'll setup a fresh Laravel installation and put it all together.
The second part is over at Setting up PhpStorm with Vagrant and Laravel Homestead, the third at Setting up Laravel with PHPUnit on Vagrant in PhpStorm
Let's get to it, shall we?
Table of contents
<
ul>
Setup PHP 7
I do almost all of my development in a virtual machine because the final product usually runs on a unix server, but from time to time I find it helpful to have a local setup available as well.
Installation
- Download the current version of PHP 7 from the PHP download page for Windows.
Simply take the version at the top of the right panel which should be the latest NTS (non thread safe) build. If you have 64-bit system, choose the VC14 x64 Non Thread Safe variant. Click on the link labeled "zip" to start the download.
- create a new folder named
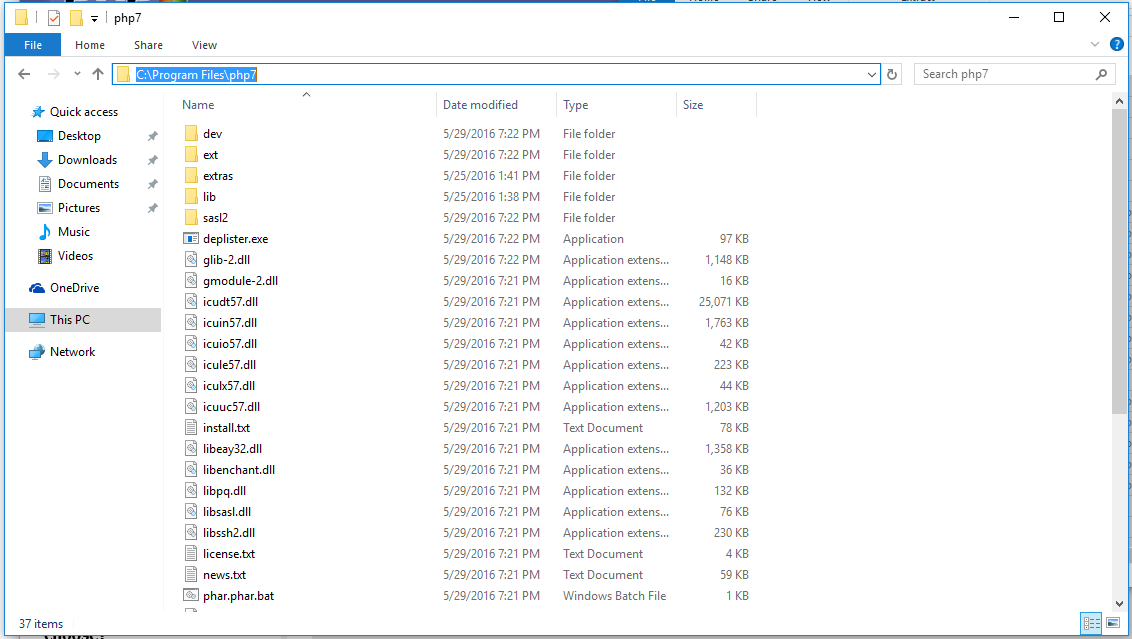
php7in your Program Files directory (e.g.C:\Program Files) and unzip the downloaded archive there - double-click the file "php.exe" to confirm no error message shows up. You might encounter the error Unable to start the program as VCRUNTIME140.dll is missing on your computer. Try reinstalling the program to fix this problem. It can be fixed by downloading and installing the corresponding file from here (found at stackoverflow) Please make sure you pick the architecture (x64/x86) that matches the previously downloaded PHP7 version!
We're almost done, but we should modify the PATH variable in order to make PHP globally available.
The PATH variable
Simply put, the PATH variable defines where Windows looks for executable files when the specified file is not found
in the current directory. So lets say you would like to know the current PHP version on your system, then
stackoverflow will tell you something along the lines of
C:\>php -v
But you will probably get this
php: command not found
or this
'php' is not recognized as an internal or external command, operable program or batch file.
That command would only work if our current working directory (the location from where we executed the php -v command) would
contain the correct php.exe file. In other words: Calling the command is not location-agnostic yet. To make it, though,
we need to modify the PATH environment variable and make it aware of the location PHP is installed at.
To do so, we need to modify the System Properties... and might as well learn some nifty shortcuts to get there along the way :)
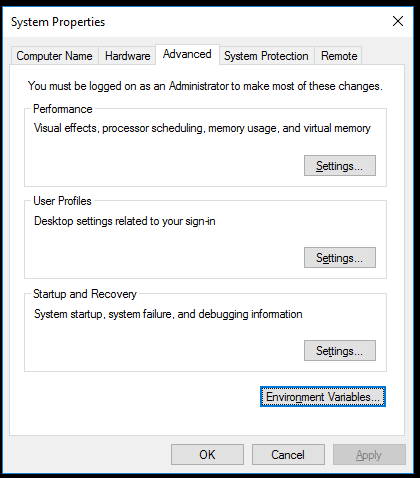
- open the "run" window by pressing
WIN + R - type
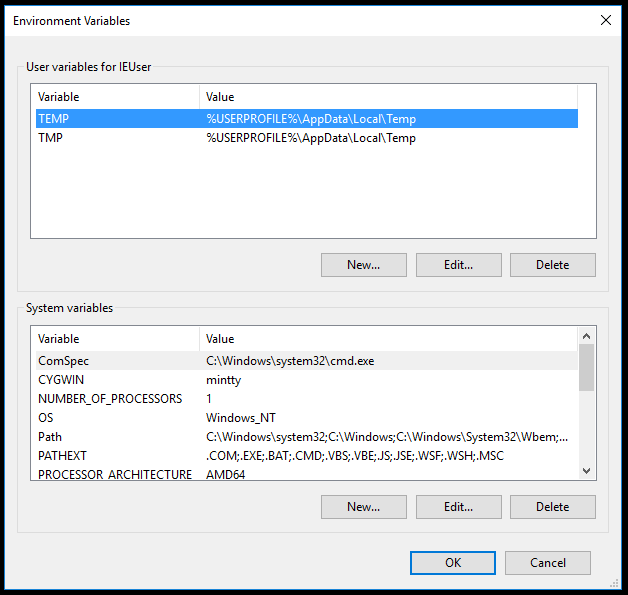
SystemPropertiesAdvancedand hit Enter - click on "Environment Variables..." at the bottom of the window
- select the
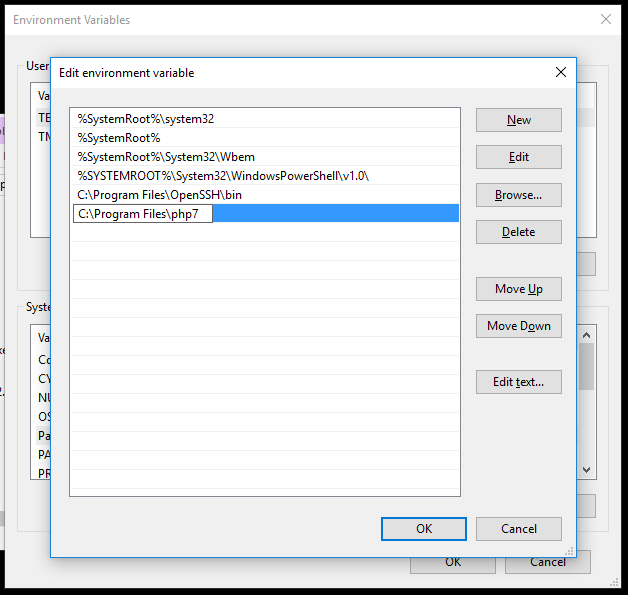
PATHentry in the list of system variables (lower half) and click "Edit..." - hit the "New" button and enter the full path to the directory that should be used to look up commands/programs.
So in the case of PHP that's the directory containing the php.exe file.
- confirm with "OK"
- open a new shell by hitting
WIN + R, typecmdand confirm with Enter- Caution: Any existing shell will not be aware of the changes in the environment variables so you need to restart a new one!
- running
php -vagain should now yield something like this:
C:\>php -v
PHP 7.0.7 (cli) (built: May 25 2016 13:08:31) ( NTS )
Copyright (c) 1997-2016 The PHP Group
Zend Engine v3.0.0, Copyright (c) 1998-2016 Zend Technologies
Cool, now on to the IDE.
Setup PhpStorm
Installation
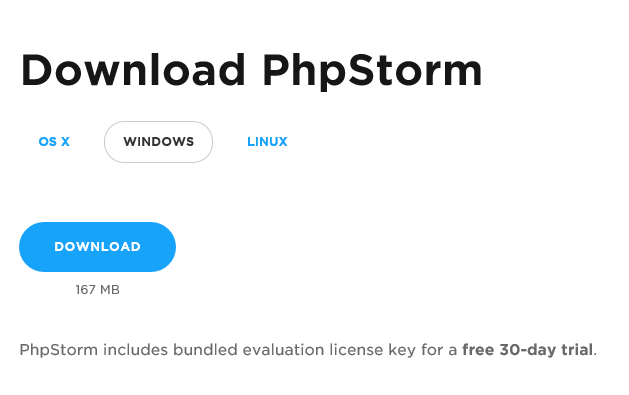
- Download the current version of PhpStorm from the PhpStorm download page
- Yes, it's paid but so far the best IDE I've come across + you get a 30 day free trial ;)
- Double-click the downloaded file (probably something like PhpStorm-2016.1.2.exe) and follow the instructions. Nothing fancy there.
- After the installation finished, run PhpStorm. You should be greeted with the question for importing previous settings. We'll go with the "I do not have a previous version of PhpStorm or I do not want to import my settings" option as we can always do that later.
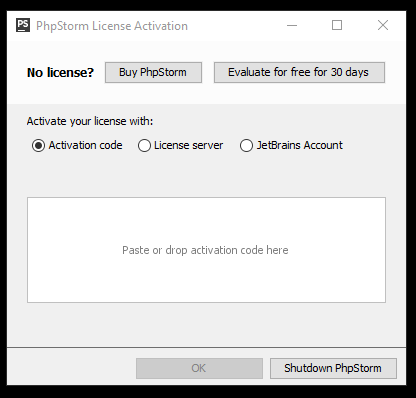
- After accepting the Privacy Policy you'll be prompted for the license activation. Unless you have a valid license,
go with the "Evaluation for free for 30 days" option and accept the license agreement afterwards.
- PhpStorm will now start and ask you for the Initial Configuration - that is Keymap scheme, IDE theme and colors/fonts.
Unless you have anything to change a that point, go with the defaults and hit OK.
- In the following New Project screen choose "PHP Empty Project" in the left hand list and hit "Create"
That'll conclude the installation :)
Setup for local PHP development
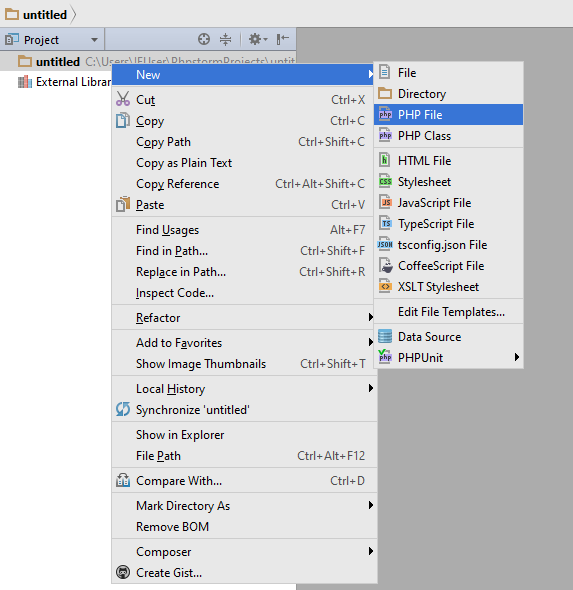
First, let's create a new PHP file by right-clicking on the project folder and choosing New > PHP File.
Name the file test.php and give it the following content:
<?php
$i = 1;
echo $i."\n";
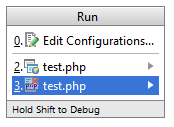
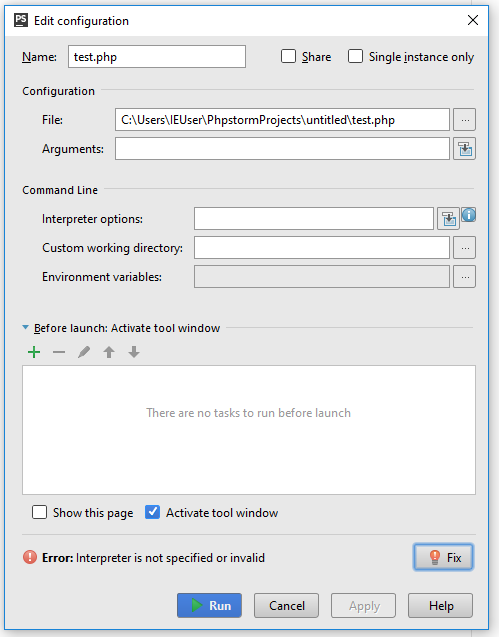
Now select Run > Run... and choose the test.php with the small PHP icon in the front.
A new window should appear because we did not specify a PHP interpreter yet so PhpStorm doesn't know how to run the file.
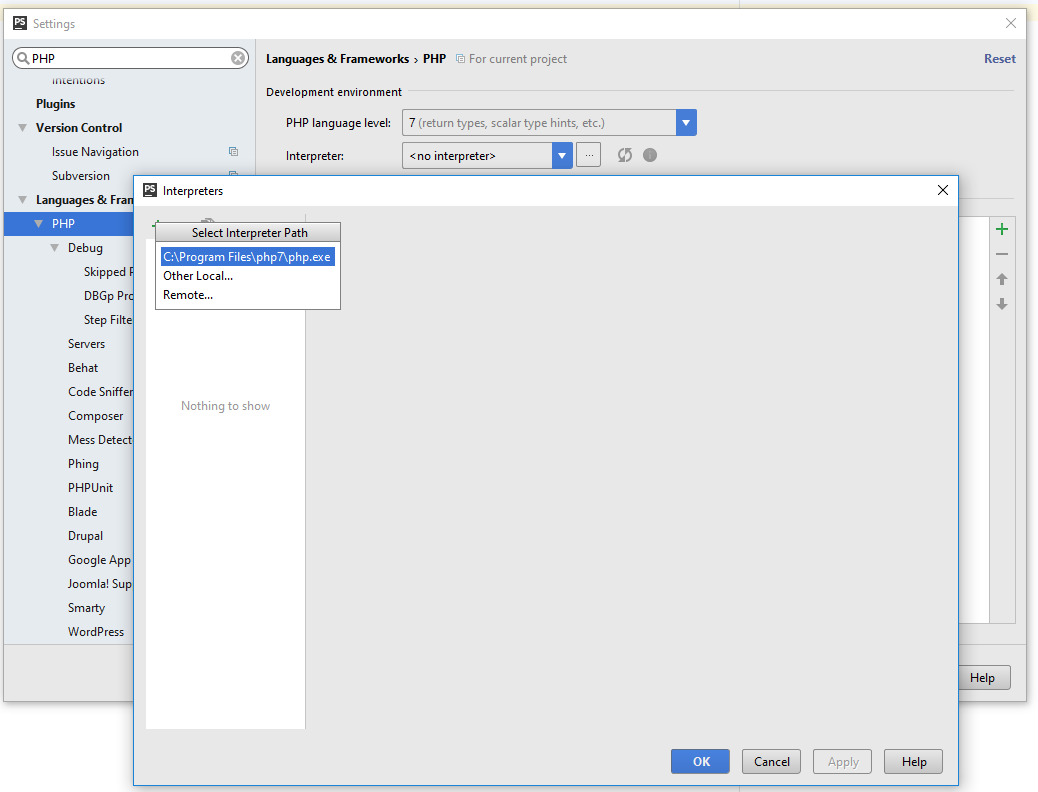
A click on the "Fix" button with the red exclamation mark will open up the PHP interpreter settings. You can get to the
same screen via File > Settings... > Languages & Frameworks > PHP. First, choose 7 (return types,
scalar type hints, etc.) as PHP language level so that scalar type hints won't get marked as an error, for instance.
Second, hit the ... button to specify an new (local) PHP interpreter and click on the green "+" icon on the top left.
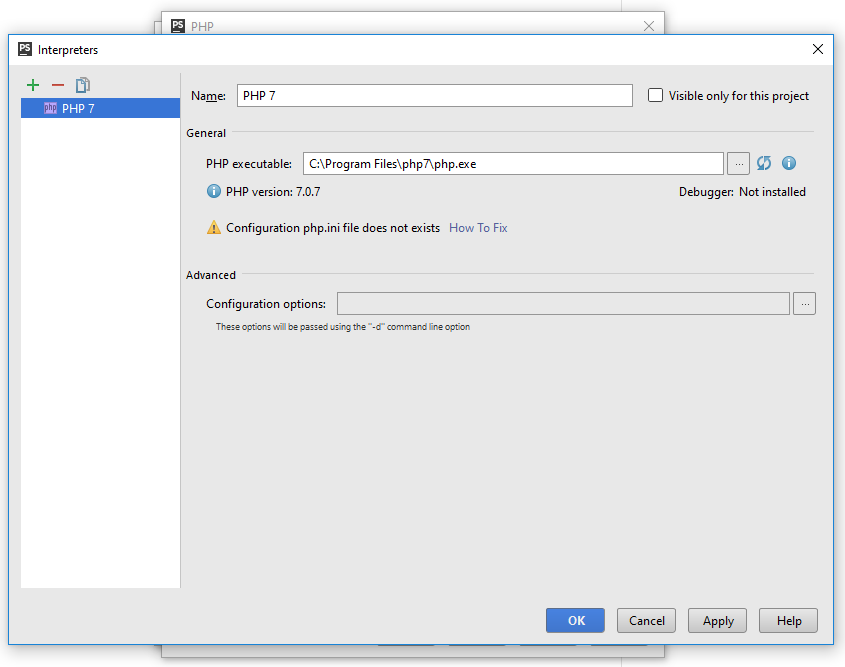
Since we installed PHP 7 before, PhpStorm should automatically provide that as an option. Otherwise choose "Other Local..."
and select the php.exe file from the install location of PHP on your system.
A little warning sign should appear, stating that the
Configuration php.ini file does not exist
Clicking on the "How To Fix" help link reveals, that PHP expects a file called php.ini in either its installation directory
or at C:\Windows. But we'll come to that in a moment. For now, we can just confirm all dialogs with "OK" and should now
be able to run the PHP file - either by right-click + selecting "Run" or (by default) hitting Shift + F10.
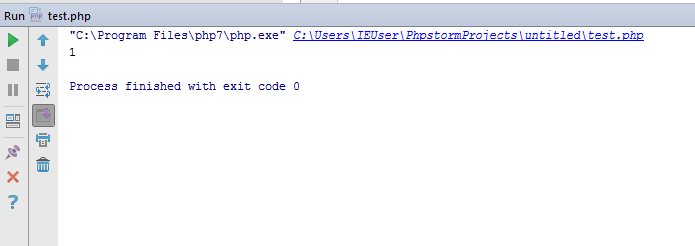
The console window of PhpStorm should open at the bottom and show something like this
"C:\Program Files\php7\php.exe" C:\Users\IEUser\PhpstormProjects\untitled\test.php
1

Process finished with exit code 0
Splendid, PhpStorm is now up and running with PHP7 :)
Installing Xdebug
Debugging is an invaluable asset during development as it lets you walk step-by-step through the source code, showing
exactly what is happening. var_dump() on freakin' steroids! Choose Run > Debug 'test.php' (or hit Shift + F9) -
and be greeted by a little error message at the bottom that goes like this:
Connection was no established: debug extension is not installed.
Unfortunately, the help link "Update interpreter info" is not really useful at that point... So what's actually going on?
In order enable debugging, we need to install the Xdebug extension. To do so, go to the
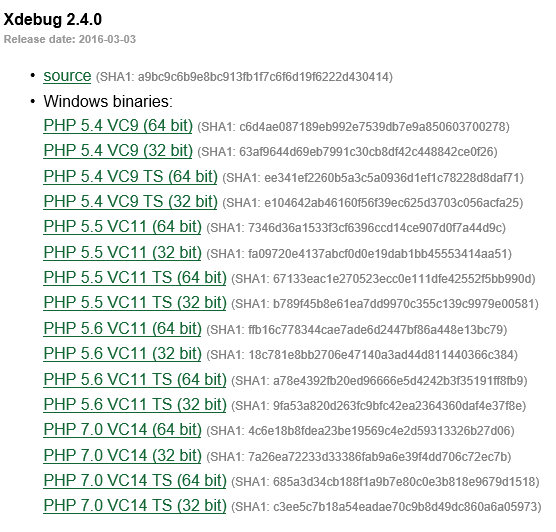
Xdebug download page and download the appropriate installer for your PHP version...
Just kidding, of course I'm going to explain how to find the right one ;) Actually it's pretty straight forward: We installed PHP 7 NTS, probably in the 64 bit version, so the link "PHP 7.0 VC14 (64bit)" should be the correct one. But since I tend forget the exact version I installed, I would like to point to Xdebug's fantastic installation wizard which simply requires us to print, copy and paste some information of our PHP installation. And here's how we gonna do that:
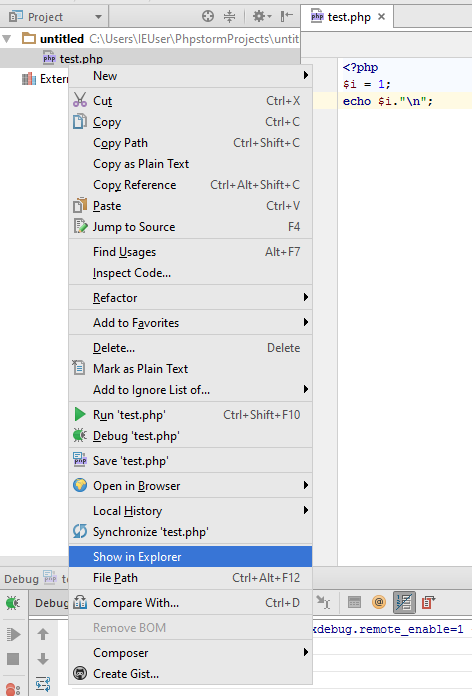
- click on the test.php file in the left pane of your PhpStorm window and select "Show in Explorer"
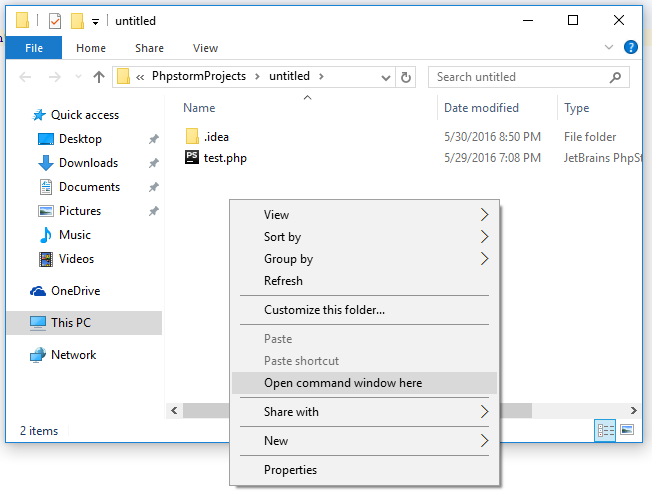
- a new window opens up at the location of the file
- press (and hold) Shift while right-clicking on an empty space within the opened folder. A new option
called "Open command window here" shows up. Click on it.
- a new shell opens at the location of the folder (I know.. neat, right?)
- type
php -i... and be overwhelmed by too much output. Since we need to copy and paste the output, echoing on the command line is somewhat cumbersome. - type
php -i > phpinfo.txtinstead to redirect the output to the filephpinfo.txt(that will be created at the location of the shell which conveniently is also the location of our PhpStorm project).If the file doesn't show up in PhpStorm after some seconds you can right-click on the parent folder and select "Synchronize [foldername]` ([foldername] is "untitled" in my example) to make PhpStorm aware of changes in the filesystem.
- open
phpinfo.txt, hitCTRL + Ato select everything andCTRL + Cto copy. - hurry back to the Xdebug installation wizard, paste everything in the textarea and click the "Analyse my phpinfo() output" button.
The wizard will provide you with exact installation instructions for your system. For me, it looks like this:
- Download php_xdebug-2.4.0-7.0-vc14-nts-x86_64.dll
- Move the downloaded file to
C:\php\ext - Create php.ini in the same folder as where php.exe is and add the line
zend_extension = C:\php\ext\php_xdebug-2.4.0-7.0-vc14-nts-x86_64.dll
You could follow those instructions directly, but I would recommend to change the directory of the extension. C:\php\ext is
the default directory for PHP to look for extensions if not specified otherwise in drumroll the php.ini - that we
shall create now. To do so, open you PHP installation directory (just as a reminder: mine was at C:\Program Files\php7), look for the file
php.ini-development copy and rename it to php.ini and open that file. Search for "extension_dir" which should lead
you to a passage that looks like this:
; Directory in which the loadable extensions (modules) reside.
; http://php.net/extension-dir
; extension_dir = "./"
; On windows:
; extension_dir = "ext"
Remove the leading ";" in front of the "extension_dir" directive and set the path to the "ext" folder in your PHP installation directory as value. For me, the line now looks like this:
extension_dir = "C:\Program Files\php7\ext"
Hint: If you don't find any "extension_dir" string in your original php.ini file just add it at the end of the file. Also, don't forget to save the file.
When re-running the php -i > phpinfo.txt step including the Xdebug wizard, the instructions now look like this:
- Download php_xdebug-2.4.0-7.0-vc14-nts-x86_64.dll
- Move the downloaded file to "C:\Program Files\php7\ext"
- Edit C:\Program Files\php7\php.ini and add the line
zend_extension = "C:\Program Files\php7\ext\php_xdebug-2.4.0-7.0-vc14-nts-x86_64.dll"
You can add the "zend_extension" line simply at the end of the php.ini.
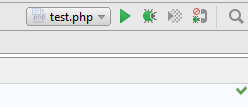
Now we should be good to go - or better to debug. Open up the test.php file in PhpStorm and click on the
little green bug icon on the top right to run the file in debug mode.
The console window pops up again and yields something like this:
"C:\Program Files\php7\php.exe" -dxdebug.remote_enable=1 -dxdebug.remote_mode=req -dxdebug.remote_port=9000 -dxdebug.remote_host=127.0.0.1 C:\Users\IEUser\PhpstormProjects\untitled\test.php
1

Process finished with exit code 0
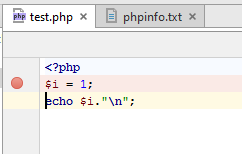
Please note the -dxdebug parameters following the php.exe call. To actually use the debugger, set a breakpoint in the
second line of the script (that says $i = 1;) by left-clicking on the little margin on the left of said line (you can
unset the breakpoint by simply clicking on it again).
Running the script now (again in debug mode) will stop the execution at that position.
Phew. Glad we got that thing working :)
Setup Composer
Next in line: PHP's beloved dependency manager Composer. I deeply believe that there's hardly a way around this wonderful tool when it comes to modern PHP development.
Installation
- download the current Windows installer from the Composer download page
- double-click the file to start the installation
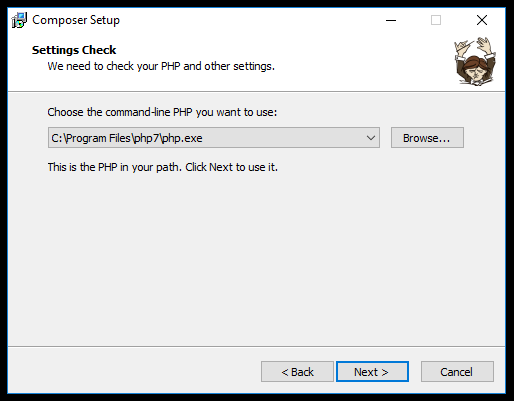
- choose the PHP version you want composer to use. The installation wizard should already show you
the installed PHP 7 php.exe file.
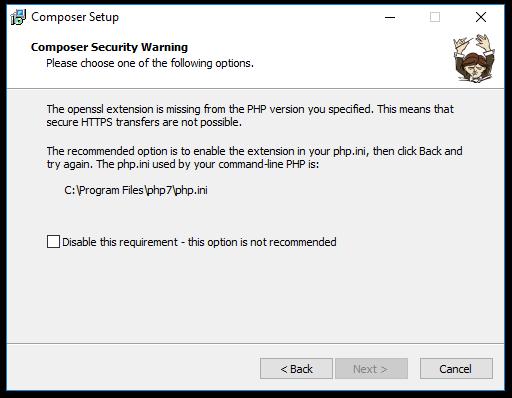
- next, you might get a security warning because the open-ssl extension is not activated and
composer can't connect via https to download some some necessary files.
So let's quickly take care of this before we continue. (We could also ignore this requirement by checking the checkbox but I'll take this opportunity to show you how extensions are enabled for PHP).
Enabling the openssl PHP extension
Open up the php.ini file in your PHP installation directory and search for "php_openssl". You should now see a line like this:
;extension=php_openssl.dll
The php_openssl.dll file should already come pre-installed in the "ext" directory within your PHP installation
directory. (It's starting to make sense that we adjusted the "extension_dir", doesn't id ;)). So you can simply
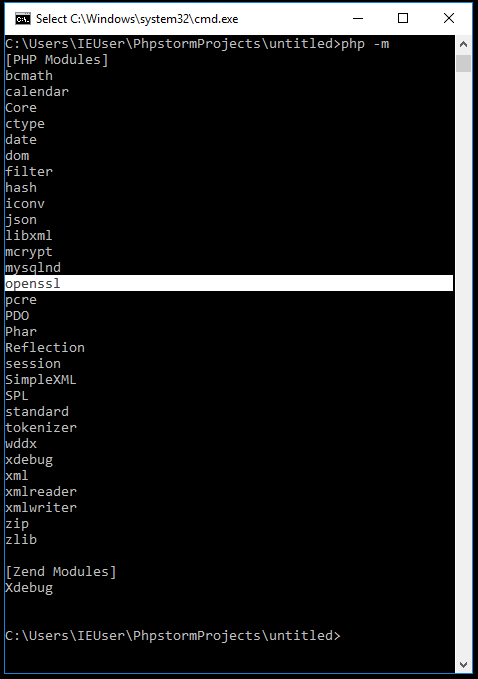
remove the ";" in front of this line. To verify that the extension is actually loaded, open up a shell and type
php -m to list all enabled modules. The list should contain an item that says openssl.
Cool. Now that that's working we shall continue with the installation process. Try hitting the "< Back" button
once to get back to the PHP executable selection. Upon clicking "Next >", the openssl warning should be gone.
If not, cancel and restart the setup. You can ignore the Proxy Settings dialog and just hit "Next >" and "Install".
Since we installed Xdebug before, Composer will show a warning that this slows down Composer but that's nothing
to worry about. Just keep hitting "Next >" and "Finish". Composer will add itself automatically to your PATH
environment variable so you can call it globally. As mentioned before, this will only affect freshly opened shells,
so let's do a quick WIN + R and a cmd.
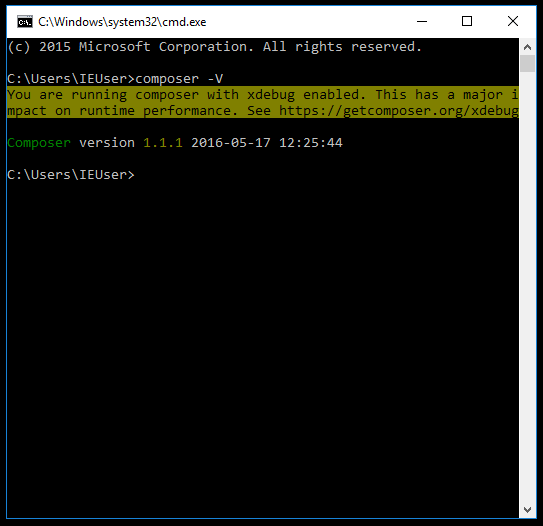
Type composer -V to print the Composer version, which should generate something along the lines of
C:\Users\IEUser>composer -V
You are running composer with xdebug enabled. This has a major impact on runtime performance. See https://getcomposer.org/xdebug
Composer version 1.1.1 2016-05-17 12:25:44
Aaaand we're done.
Phrase Express
This is more of bonus since it's a somewhat opinionated software but I've grown very fond of it over the last couple of years. Phrase Express is a clipboard manager / text expander for Windows. You can download the tool for free at the Phrase Express download page (Download Client).
There's actually not much to tell about the installation process so I'm just gonna outline my major use cases.
Clipboard cache
This one is a biggie: Phrase Express saves everything you copy to the clipboard in a cache that can be accessed
via CRTL + ALT + V (by default). I cannot emphasize how incredibly handy that is.
Text expansion
There's a couple of things I have to type frequently (or at least from time to time) and it's just cumbersome to either write them out in full length or to look them up. Here's my short list to give you an idea:
| auto text | meaning | |
|---|---|---|
| mee | my email address | |
| myssh | my public ssh key | |
| mytax | my tax id | |
| myserver | ip address of my server | |
| ts | the current timestamp in Y-m-d format | |
| tsf | the current timestamp in Y-m-d H:i:s format | |
| *shrug | ¯\_(ツ)_/¯ | |
| *party | (ツ)_\m/ | |
| cmark | ✓ | |
| killphp | ps aux | grep php | awk '{print $2}' | sudo xargs kill |
Wanna stay in touch?
Since you ended up on this blog, chances are pretty high that you're into Software Development (probably PHP, Laravel, Docker or Google Big Query) and I'm a big fan of feedback and networking.
So - if you'd like to stay in touch, feel free to shoot me an email with a couple of words about yourself and/or connect with me on LinkedIn or Twitter or simply subscribe to my RSS feed or go the crazy route and subscribe via mail and don't forget to leave a comment :)
Subscribe to posts via mail

